Laboratory work number 6 study. Propagation of indoor plants
Laboratory work No. 1.
Study of the organs of a flowering plant.
Target: study the external structure of a flowering plant.
Equipment: hand magnifying glass, dissecting needle, shepherd's purse plant.
Progress
1.Look at a flowering plant.
2. Find its root and shoot, determine their sizes and sketch their shape. 3. Determine where the flowers and fruits are.
4.Look at the flower, note its color and size.
5.Look at the fruits and determine their quantity.
6. Sketch the plant, label all parts.
Laboratory work. No. 2.
Introduction to plant cells
(using the example of tomato cells and onion skin).
Goal: and study the structure of a plant cell.
Equipment: hand magnifying glass, microscope, pipette, glass slide, bandage, part of an onion, ripe tomato fruit.
Progress
Exercise 1.
Prepare the onion skin preparation. To do this, use tweezers to separate the bottom surface of the onion scales and remove the transparent skin.
Examine the preparation under a microscope. Find the cell membrane, cytoplasm, nucleus and vacuole in the cells. View at low magnification.
Examine the cell at high magnification.
Draw the structure of an onion skin cell in your notebook and label its parts.
Task 2.
Cut a ripe tomato fruit.
Prepare a microslide from the pulp of the fruit.
Examine the pulp cells of a tomato fruit under a microscope.
Draw the shape of the cells in your notebook.
After viewing, wash the glass and put your instruments in order.
Laboratory work. No. 3.
Studying the structure of the seed of dicotyledonous plants (using the example of beans).
Target: study the external and internal structure of the seed of a dicotyledonous plant.
Equipment: hand magnifying glass, dissecting needle, dry and swollen bean seeds.
Progress
1. Examine the dry and swollen bean seeds. Compare their sizes and external shape.
2. Find the hilum and seed entrance. Using a dissecting needle, remove the shiny, dense skin from the swollen seed.
3. Find the embryo of the seed. Study its structure. Consider the parts of the embryo: two cotyledons, an embryonic root, a stem and a bud.
4. Determine which part of the bean seed contains reserve nutrients.
5.Draw the seed and label its parts.
Laboratory work No. 4.
Root structure of a seedling (pea, pumpkin). Growth (extension) zone at the root.
Target: study the external structure of the root.
Equipment: hand magnifying glass, sprouted pumpkin seed (or radish, pea).
Progress.
1. Examine the root of a sprouted pumpkin seed (or radish, peas, beans) with the naked eye. Note its length, thickness and color. Find the root cap at the end of the spine.
2. Pay attention to the part of the root above the root cap and growth zone. Find outgrowths in the form of fluff - root hairs. Read the textbook about their structure and meaning.
3. Examine the finished microslide “Root cap. Root hairs." Pay attention to the growth (stretch) zone.
4. Compare what you saw under the microscope with the picture in the textbook, sketch and label it.
5.What do the structure of root hairs and onion skin cells have in common? What explains the difference in their shape?
Laboratory work No. 5
External and internal structure of the leaf.
Target: study of the external structure of simple leaves.
Equipment: indoor plants: pelargonium, tradescantia, herbarium of leaves of birch, oak, lilac and other plants, microscopes, micropreparations “Camellia Leaf”.
Progress.
1.Look at the sheet. Select the characteristics corresponding to its structure according to the following plan: leaf type; leaf venation; leaf shape; type of sheet according to the ratio of length, width and location of the widest part; edge shape. Use a ruler and pencil when doing the work.
A. Sheet type
1) petiolate
2) sedentary
B. Leaf venation
1) parallel
2) arcuate
3) fingered
4) feathery
IN. Leaf shape
1) pinnately lobed
2) pinnately divided

3) pinnately dissected

4) solid

G . Sheet type by the ratio of length, width and location of the widest part
The length exceeds the width by 1.5 - 2 times
1) ovoid

2) oval

3) obovate

The length exceeds the width by 3 - 4 times
4) lanceolate

5) oblong

6) back-lanceolate

D. Leaf edge
1) whole edge
2) wavy
3) serrated
4) doubly serrated
5) bladed
Enter the numbers of the selected answers under the corresponding letters in the table.
1. Stinging nettle

2.Apricot

3. Monstera

4. Violet uzumbarica

5. Silver birch

8. Plantain


2. Examine the finished microslide “Camellia Leaf” - a cross section under a microscope, first under low magnification and then at high magnification.
Find the upper skin, note the features of their structure.
Under the upper skin, find cells of columnar and spongy tissue, compare them. Find intercellular spaces and chloroplasts.
Find vascular bundles and identify vessels, sieve tubes and fibers in them
Examine the lower skin with stomata and an air cavity opposite the stomatal fissure.
Use your textbook to fill out the table.
Internal structure of the leaf.
Fabric types
Features of cell structure
1. Covering tissue (skin)
2.Columnar fabric
3.Sponge tissue
4.Conductive fabric
A) vessels -
B) sieve tubes -
5.Mechanical fabric
Fibers -
Laboratory work No. 6
External and internal structure of the stem.
Target: study the structure of the stem.
Equipment: tools, winter poplar branch, pelargonium houseplant.
Progress.
1.Look at the stem of a poplar (or pelargonium) branch. Find nodes and internodes.
Look for lentils and leaf scars on the poplar branch.
2.Make a cross-section of the poplar stem. Examine it with a magnifying glass. Using Figures 55 and 57, find the main parts of the internal structure of the stem.
3. Determine the number of annual rings on a poplar branch. Find the cambium layer.
4.Make a longitudinal section of the poplar stem. Consider it. Check the hardness of the heartwood, wood and bark with a needle.
5.Separate the bark from the wood. Explain why it comes off so easily.
6.Draw longitudinal and transverse sections of the branch and label the names of each part of the stem.
7. Fill out the table:
Textile
Stem layer
Features of cell structure
Meaning
Wood
Core
Laboratory work No. 7
The structure of the rhizome, tuber and bulb.
Target: study the structure of underground shoots.
Equipment: potato tuber, herbarium of rhizomatous plant (wheatgrass), onion bulb.
Progress
1. Examine wheatgrass and its rhizome in the herbarium. Look for nodes, internodes, scale-like leaves and adventitious roots.
2. Consider a potato tuber. Find his eyes. By what criteria did you identify them? Look at the eyes under a magnifying glass.
3.Make a thin cross-section of the tuber. Hold it up to the light. Compare the cross section of the tuber with the cross section of the stem.
4.Draw a cross section of the tuber.
5.Drop iodine onto the cut of the tuber. Explain what happened.
6. Consider the external structure of the bulb. What is the significance of dry scales?
7.Look at the onion cut lengthwise. Find the stem and leaves of the bulb. Determine the difference between a bulb, a rhizome and a tuber. Draw a longitudinal section of the bulb and indicate the scales, bottom, buds, adventitious roots.
8.Prove that the rhizome, tuber and bulb are modified shoots.
Laboratory work No. 8
Propagation of indoor plants.
Target: to develop basic skills in cutting houseplants.
Equipment: three bottles of water, a scalpel, indoor plants: tradescantia, saintpaulia, metallic begonia, sansevieria, coleus.
Progress
Cuttings from stems
Carefully examine the shoots of plants: tradescantia, coleus, metallic begonia. Note that adventitious roots appear earliest near the nodes. Therefore, the lower cut must be made under the node. Cut the shoot into cuttings with 2-3 leaves (nodes) on each. Remove the bottom sheet. Place the cuttings in water so that 2/3 of the stem is above the water.
Leaf cuttings
Cut off the leaf blade of Saintpaulia (or gloxinia, bush peperomia, episcia) along with the petiole and place it in water (shallow). Cut a long leaf of Sansevieria (or streptocarpus) into leaf cuttings, each 5-7 cm long. Place them in water (shallow). Do not confuse the top and bottom of the cuttings!
Monitoring the development of roots in cuttings
Place all vessels with cuttings in a bright, cool place.
Once the roots have developed, plant the cuttings in flower pots with soil and water them.
Record observations of root development in the table:
Plant
Cutting date
Date of first root appearance
Date of development of roots 1.5 - 2 cm long
Date of planting in soil
Laboratory work No. 9
Study of the external structure of algae.
Target: familiarization with the structural features of algae, learning to establish the relationship between structure and function.
Equipment: water from an aquarium with single-celled green algae; slide and cover glass, pipette; microscope; micropreparation "Spirogyra".
Progress.
1. Prepare a microspecimen from bloomed aquarium water, examine it under a microscope, find chlamydomonas and chlorella.
2. Study of the structure of the Chlamydomonas cell.
3. Study of the structure of the chlorella cell
4. Examine spirogyra under a microscope, study the structure of spirogyra.
5.Draw the algae you saw in your notebook and label their parts.
6.Draw conclusions:
On the similarities in the structure of cells of the algae Chlamydomonas, Chlorella and Spirogyra.
About the differences in the structure of the cells of the algae Chlamydomonas, Chlorella and Spirogyra.
Laboratory work No. 10
Study of the external structure of mosses.
Target: acquaintance with the external structure of green moss.
Equipment: hand magnifying glass, bottle of water, glass slide, cuckoo flax (herbarium and handout), sphagnum moss.
Progress
1.Study the structural features of green moss (for example, cuckoo flax) - its stem, leaves, box on the stem. Determine whether the plant is male or female.
2.Study the structure of the box. Remove the cap. Pour some of the spores onto a piece of paper. Examine them under a magnifying glass. Blow lightly on the spores. Notice how they fly apart when the wind blows. Draw a conclusion about the distribution of the plant.
3.Compare cuckoo flax with sphagnum moss. Note the structure, shape of the leaves, bolls, and branching of the stem.
4.Pour a large drop of water onto the slide. Place sphagnum moss on it. Draw conclusions about what will happen.
Laboratory work No. 11
Study of the external structure of a fern.
Target: acquaintance with the structure of ferns, horsetails and mosses,
learn to identify their features
Equipment: herbarium fern leaves with sporangia, herbarium fern rhizomes and adventitious roots; fern leaf (growing in the biology classroom); magnifier and microscope; microslide "Fern Sorus".
Progress.
1.Look at the fern on a herbarium sheet and note the features of its leaves, stem, rhizome and roots.
2. On the lower surface of the fern leaf, find brown tubercles; they contain sporangia with spores.
3.Look at the "fern sorus" under a microscope
4.Answer the questions: What is the root system of a fern? How do leaves grow? Justify that ferns belong to higher spore plants.
Laboratory work No. 12
Target: study of the appearance of shoots, cones and seeds of conifers.
Equipment: pine shoots, spruce shoots, pine cones, spruce cones.
Progress
1. Consider the appearance of small branches (shoots) of pine and spruce. Indicate their main differences.
2. Study how the needles of these plants are arranged. Find the shortened side shoots of the pine tree that have needles. How many are there on these shoots?
3. Compare pine and spruce needles, their shape, color, size. Studying the structure of cones and seeds
4.Look at the cones of pine and spruce. Point out their differences.
5. Find traces left by seeds on the scales of the cone.
6.Fill out the table.
Signs
Location on the stem
Laboratory work No. 13.
Study of the structure and diversity of angiosperms.
Target:
Study the structure of plants in the Angiosperms department. Learn to distinguish between representatives of the classes Dicotyledons and Monocots.
Progress:
1. Familiarize yourself with the structure of a representative of the Dicotyledonous class - rosehip. Determine the main elements of its structure. Study the structure of a rose hip shoot, leaves, flower, fruit.
2. Familiarize yourself with the structure of a representative of the Monocot class - wheat. Determine the main elements of its structure. Study the structure of a wheat shoot, leaves, inflorescence, single flower, fruit.
3. Draw a conclusion regarding the structural features of plants of the classes Dicotyledons and Monocots.
Laboratory work 14.
Determining whether plants belong to a certain systematic group using reference books and determinants (classification).
Target:
Familiarize yourself with the principles of constructing dichotomous determinants. Using the proposed interactive determinant, determine the systematic position of some representatives of the Plant kingdom.
Progress:
1. Look at the image of one of the two plants proposed for identification.
2. By choosing one of two alternative options, arrive at a determination of the systematic position of a given plant.
3. Identify the second plant in the same way.
4. Draw a conclusion from the work done.
Laboratory work No. 15.
Recognition of the most important agricultural crops.
Target: learn to recognize the most important agricultural crops and identify their significance for humans.
Equipment: drawings and photographs of agricultural crops.
Progress
1. From the list (1-12), select the numbers of those drawings that depict the most important agricultural crops.
№1  №2
№2  №3
№3 
№4  №5
№5  №6
№6 
№7  №8
№8  №9
№9 
№10  №11
№11  №12
№12 
2.Fill out the table.
Figure No.
Name of culture
Meaning in human life
Laboratory work No. 16.
Study of the structure of mold fungi.
Target: get to know the external structure of mold fungi.
Equipment: microscope, ready-made microslides “Mold mukor”, mold on food products.
Progress
1. Consider the culture of mold fungi. Pay attention to the color of the mold and note its smell.
2.Use a dissecting needle to move some of the mold to the side. Note the condition of the food below.
3. Determine the feeding method of mold fungi.
4. Examine the fungal hyphae, fruiting body and spores at low and high magnification. Note the color of the hyphae and spores. Sketch what you saw and label the names of the main parts of the mukor.
Laboratory work No. 17
Recognition of edible and poisonous mushrooms.
Goal of the work: learn to recognize edible and poisonous mushrooms.
Equipment : projector, dummies of mushroom caps.
Progress
1.Compare the representatives of cap mushrooms:
Champignons and toadstool.
Edible chanterelles and false chanterelles.
False honey mushrooms and edible honey mushrooms.
Gall and porcini mushrooms.
2. Find the differences between mushrooms - doubles.
3.What conclusion can we draw after completing the laboratory work? (We have learned to recognize edible and poisonous mushrooms; many mushrooms are similar in appearance)
Literature
Biology. Plants. Bacteria. Mushrooms. Lichens. 6th grade: lesson plans based on the textbook by I.N. Ponomareva, O.A. Kornilova, V.S. Kuchmenko / author - comp. T.V. Zarudnyaya. Volgograd: Teacher, 2007.
Illarionov E.F. Biology 6 (7) grade: Lesson developments. M.: Vako, 2003.
Korchagina V.A. Biology: Plants, bacteria, fungi, lichens. Textbook for 6-7 grades. general educational institutions. – 24th ed. – M.: 1999.
Ponomareva I.N., Kornilova O.A., Kuchmenko V.S. Biology. 6th grade Plants. Bacteria. Mushrooms. Lichens. – M.: Ventana-Graf, 2005.
FIPI. Open bank of OGE tasks. Biology.
In our world, a huge number of physical phenomena occur every second. To be aware of their nature and significance, a person must have a good knowledge of physics. This school subject covers many topics. In the eighth grade, students usually study thermal, electrical, electromagnetic and light phenomena, as well as states of matter. These sections are discussed in detail in the textbook by the author Peryshkin A.V. The publication was reprinted many times, and many people studied from it, both in the Soviet Union and in Russia.
Like many other teaching aids, this book is supplemented by a workbook. The collection is extremely necessary for those students who encounter difficulties when considering any questions and solving problems. It is also useful for eighth-graders who understand physics well and need to self-test their knowledge.
How can a solver help?
When used correctly physics manuals for grade 8 (authors: Peryshkin A.V., Shutnik E.M.) can be an excellent assistant in the knowledge of physical science. Using it, a teenager has the opportunity to:
- increase the level of knowledge and skills;
- hone your skills in solving exercises of basic and advanced complexity;
- work on your academic performance;
- prepare for upcoming independent tests, Olympiads, and exams;
- increase authority among the teacher and classmates.
GDZ in physics, edited by Peryshkin A.V. suitable not only for schoolchildren, but also for their parents. Adults can use it as a monitoring tool and also to refresh their memory of school material. In the latter case, mom and dad will be ready to sort out an incomprehensible task together with the child. Teachers will also be able to use the resource for professional purposes to develop their own materials.
Collection device
In addition to the proposed solution algorithms and answers, there are also keys to the questions after the paragraph and materials for laboratory work. Such a complex will ensure a complete understanding of the 8th grade program and will ensure that in a year the student will be ready for final tests in the format of the main state exam.
In the 9th grade, students are faced with a colossal load, and physics plays an important role in this. During this time period, students study topics such as the laws of interaction and motion of bodies, mechanical vibrations and waves, sound, electromagnetic field, the structure of the atom and nucleus. Each section must be taken seriously. In addition, some students choose it as a subject for the OGE exam.
The vast majority of schools use the classic textbook on the subject authored by A.V. Peryshkin. and Shutnik E.M. These methodologists are known for their textbooks, which millions of people have learned from. In addition to detailed theoretical material, the book also contains questions after paragraphs and exercises to consolidate knowledge. Students often have difficulty finding answers and solving assignments. In such cases, it can come to their aid Physics workbook for grade 9 (authors: Peryshkin A.V. and Shutnik E.M.) with ready keys.
How does the GDZ collection work and how to use it correctly?
The manual contains both detailed algorithms for finding answers to problems and explanations of the questions after the paragraph. To find the information you need, just find your number. Among other things, there are auxiliary materials for laboratory practice and a section for self-testing.
Before viewing the information provided, the ninth-grader is recommended to try to solve the task on his own. After this, you can access the keys and compare the results. All examples comply with the Federal State Educational Standard, so there is no doubt about their correctness.
How can ready-made homework help?
This publication is intended for schoolchildren who may not be very well versed in the subject, but want to have a good grade. The guide will help them:
- qualitatively analyze your activities and level of knowledge;
- fill in gaps in the material covered;
- improve the average score in the discipline.
Laboratory work No. 1 in biology for grade 6 “Study of the structure of the seed of dicotyledonous plants (using the example of beans)”
Target: study the external and internal structure of the seed of a dicotyledonous plant.Tasks:
- Expand knowledge about the structure of plant organisms.
- get acquainted with the structural features of seeds of monocotyledonous and dicotyledonous plants.
- Form an idea of a seed as a generative organ of a flowering plant.
- Reveal the importance of seeds in plant life.
Equipment: hand magnifying glass, dissecting needle, dry and swollen bean seeds.
Theoretical part
Once in favorable conditions, the seed germinates. In this case, a root first appears from the seed, then a small shoot. Such a young plant is called a seedling. After some time, it develops leafy shoots, and later flowers, fruits and seeds. In other words, a new plant grows from the seed, very similar to the mother one. The seed is considered the organ of sexual reproduction of the plant.
Outside, the seeds have a dense covering - a peel. The main function of the seed coat is to protect the seed from damage, drying out, penetration of pathogens and from premature germination.
In some plants the seed coat is dense but thin, in others it is woody, thick and very hard (plum, almond, grape, etc.).
There is a scar on the peel - a mark from the place where the seed is attached to the wall of the fruit. Next to the hilum there is a small hole - the spermatic opening. Through the seed entrance, water penetrates into the seed, after which the seed swells and germinates.
The skin is difficult to remove from dry seeds. But when it takes in water through the spermatic opening and swells, the peel will burst, it can be easily removed, and then the internal structure of the seed will be revealed. Inside the seed, under the skin, is an embryo - a small new plant.
In some plants (beans, pumpkin, apple tree, etc.) the embryo is large, and it can be seen if you remove the skin from the seed. In others (pepper, tricolor violet, lily of the valley, onion, etc.), the embryo is very small, it lies in the seed, surrounded by endosperm (from the Greek endon - “inside”, sperm - “seed”) - special cells that contain a lot reserve nutrients. In such seeds, the skin does not surround the embryo, but the endosperm, inside which is the plant embryo.
Endosperm is the storage tissue of the seed.
The endosperm is represented by large cells, entirely filled with nutrients in the form of starch, proteins and various oils. All these substances serve as the embryo’s first source of nutrition during seed germination.
The embryo of a new plant in the seed has two clearly distinguishable parts: the embryonic shoot and the embryonic root.
The embryonic shoot is represented by an embryonic stem, cotyledons (first leaves) and an embryonic bud. For example, beans, pumpkins, apple trees and cucumbers always have two large fleshy cotyledons in the embryo, while wheat, corn, tulips and lilies of the valley have only one cotyledon.
Practical part
Progress:1. Examine the dry and swollen bean seeds. Compare their sizes and external shape.
2. Take a bean seed and examine it with the naked eye and using a magnifying glass. Find the scar - the place where the seed was attached to the wall of the fruit and the micropyle - the hole through which water and air penetrate into the seed.
3. Using a dissecting needle, remove the shiny, dense skin from the swollen seed.
4.Find the seed embryo. Study its structure. Consider the parts of the embryo: two cotyledons, an embryonic root, a stem and a bud.
5. Determine which part of the bean seed contains reserve nutrients.
Task 1. Draw the external structure of the seed from the hilum side and label its parts.
Task 2. Draw the structure of a bean seed (Figure 1), label its parts.
Task 3. Look at the diagram of the structure of the seed of a monocotyledonous plant (see the textbook figure). Find the main parts of the embryo: root, stalk, cotyledon (embryo leaf), bud, scutellum.
Task 4. Sketch the appearance of the grain (Figure 2).
Rice. 1. Structure of a bean seed
Task 5. Compare how the structure of the seeds of dicotyledonous plants differs from the seeds of monocotyledonous plants? What are their similarities? Write down your conclusion in your notebook.
Task 6. Think and write down: what importance do seeds have in the life of plants?
Rice. 2. The structure of the seed of monocotyledonous plants - wheat grain

Conclusion: During the work _________________________________________________.
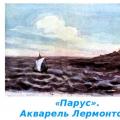 Mikhail Lermontov - sail What is he looking for in the land
 5 2 solar apocalypse
 Tvardovsky: biography, briefly about life and work